Thangka painting is far more than a decorative wall hanging; it’s a sacred, meditative art form that has guided Buddhist practitioners for centuries. Behind every luminous Thangka lies a rich web of symbolism, strict proportions, and mindful technique. Whether you’re an aspiring artist, a spiritual seeker, or simply an art lover, understanding how Thangka painting really works can deepen your appreciation of this delicate tradition and help you create more vibrant, meaningful Buddhist art yourself.
What Is Thangka Painting?
A Thangka is a traditional Tibetan Buddhist scroll painting, usually depicting:
- Buddhas and Bodhisattvas
- Mandalas
- Teachers and lineage masters
- Scenes from Buddhist cosmology or scripture
Unlike framed paintings, Thangkas are typically mounted on textile backings and can be rolled for storage or travel. Historically they functioned as:
- Visual teaching tools for complex Buddhist doctrines
- Aids for meditation and visualization practices
- Portable shrines for monks and lay practitioners
Authentic Thangka painting follows codified iconographic rules. Colors, hand gestures (mudras), postures (asanas), and even the direction a figure faces all carry specific meaning within Buddhist philosophy.
Materials and Tools for Traditional Thangka Painting
The vibrancy and longevity of a Thangka depend heavily on the materials you choose. Traditional artisans often prepare everything by hand, but you can adapt some steps with modern tools while respecting the spirit of the practice.
Support: Cotton or Silk
- Canvas: Fine, tightly woven cotton is most common. Silk is used for special or highly detailed works.
- Stretching frame: A wooden frame or stretcher keeps the fabric taut while you work, preventing warping and cracking.
Ground and Binding
- Chalk or gypsum powder: Mixed with animal glue (or a suitable modern alternative) to create a smooth gesso-like ground.
- Sizing glue: Traditionally, hide glue is used to prime the fabric before applying chalk. Vegan options are increasingly used by contemporary artists.
Pigments and Paint
- Mineral pigments: Ground natural minerals (e.g., malachite for green, cinnabar for red, lapis lazuli for blue) offer unmatched depth and durability.
- Plant-based pigments: Additional color range from organic sources.
- Gold: Real gold leaf or powder is used for halos, ornaments, and divine radiance.
- Binder: Animal glue or a plant-based binder mixed with water to create a paintable medium.
Essential Tools
- Fine-tipped sable or synthetic brushes for line work
- Broader brushes for washes and backgrounds
- Charcoal or pencil for initial sketches
- Metal ruler and compass for geometric structures and mandalas
- Burnishing stone (e.g., agate) for polishing gold surfaces
The Spiritual Foundation: Intention and Preparation
Thangka painting is traditionally considered a practice of devotion and mindfulness rather than just craft.
- Motivation: Many artists start with a short meditation or prayer, setting the intention that the painting benefit all beings.
- Clean workspace: A tidy, quiet space supports concentration and reduces the risk of damaging the piece.
- Reference texts: Iconographic manuals, lineage examples, and teacher guidance help ensure that proportions and symbols conform to tradition.
Even if you’re not a Buddhist practitioner, approaching Thangka painting with respect and focus will improve both your experience and your results.
Step 1: Preparing the Canvas
Proper preparation ensures a stable surface that can hold detailed line work and layered color.
-
Stretching the fabric
- Attach the cotton to a wooden frame with strong thread or staples.
- Tighten until the surface is evenly taut like a drum skin.
-
Sizing
- Brush a thin solution of warm glue and water evenly across the fabric.
- Allow it to soak in and dry fully; this seals the fibers.
-
Applying the ground
- Mix chalk or gypsum powder with glue and water to a cream-like consistency.
- Apply several thin coats with a broad brush, letting each layer dry.
- Avoid thick, heavy layers that will crack later.
-
Polishing the surface
- Once fully dry, gently sand with very fine sandpaper or rub with a smooth stone wrapped in cloth.
- The goal: a smooth, eggshell-like surface that receives fine lines beautifully.
Step 2: Compositional Layout and Sacred Proportions
Thangka painting isn’t free-form; it follows strict geometric systems that express the perfection of enlightened qualities.
Establishing the Main Axes
- Draw a vertical center line and key horizontal guidelines on the prepared surface.
- Mark important proportional points for the head, shoulders, heart, navel, and knees of the central figure.
Canonical Proportions
Traditionally, measurements use a unit based on the figure’s head or finger widths. For example:
- Overall body height in head units (e.g., seven or more heads tall)
- Symmetrical placement of eyes, shoulders, and hands
- Fixed ratios for the size of the face, torso, and limbs
These proportions aren’t arbitrary; they symbolize balanced wisdom and compassion embodied by Buddhas and Bodhisattvas.
Step 3: Drawing the Outline (Preliminary and Final)
Rough Sketch
- Start with light charcoal or a hard pencil.
- Block in the basic shapes: head, torso, limbs, lotus throne, background elements.
- Keep lines soft and tentative; this is the stage to correct mistakes.
Refining the Drawing
- Once satisfied, go over the correct lines more firmly.
- Use a ruler and compass for architectural elements, mandalas, and halos.
- Ensure symmetry by measuring across the center line for both sides of the body and ornaments.
Inking the Outline
- Using a fine brush and dark ink or pigment, carefully paint the final contour lines.
- Vary line thickness subtly to convey depth and delicacy.
- After inking, gently remove visible sketch marks, taking care not to damage the surface.
At this stage, the spiritual “skeleton” of the Thangka is complete; every important symbolic element is present in outline.
Step 4: Laying in Background and Base Colors
Traditional Thangka painting typically moves from broader areas to finer details.
Background First
- Paint the sky, clouds, mountains, and ground before the central figure.
- Use relatively flat, even tones for large areas.
- Keep colors slightly lighter than you expect; shading and outlining will deepen them later.
Base Colors for Figures
- Apply flat base colors to skin, robes, lotus petals, and ornaments.
- Maintain color symbolism:
- White: purity, pacifying wisdom
- Blue: vastness, steadfast compassion
- Red: magnetizing energy and passion transformed
- Green: active compassion, accomplishment
- Yellow/Gold: enrichment, abundance
Allow each layer to dry fully before adding another to avoid lifting pigment or creating muddiness.
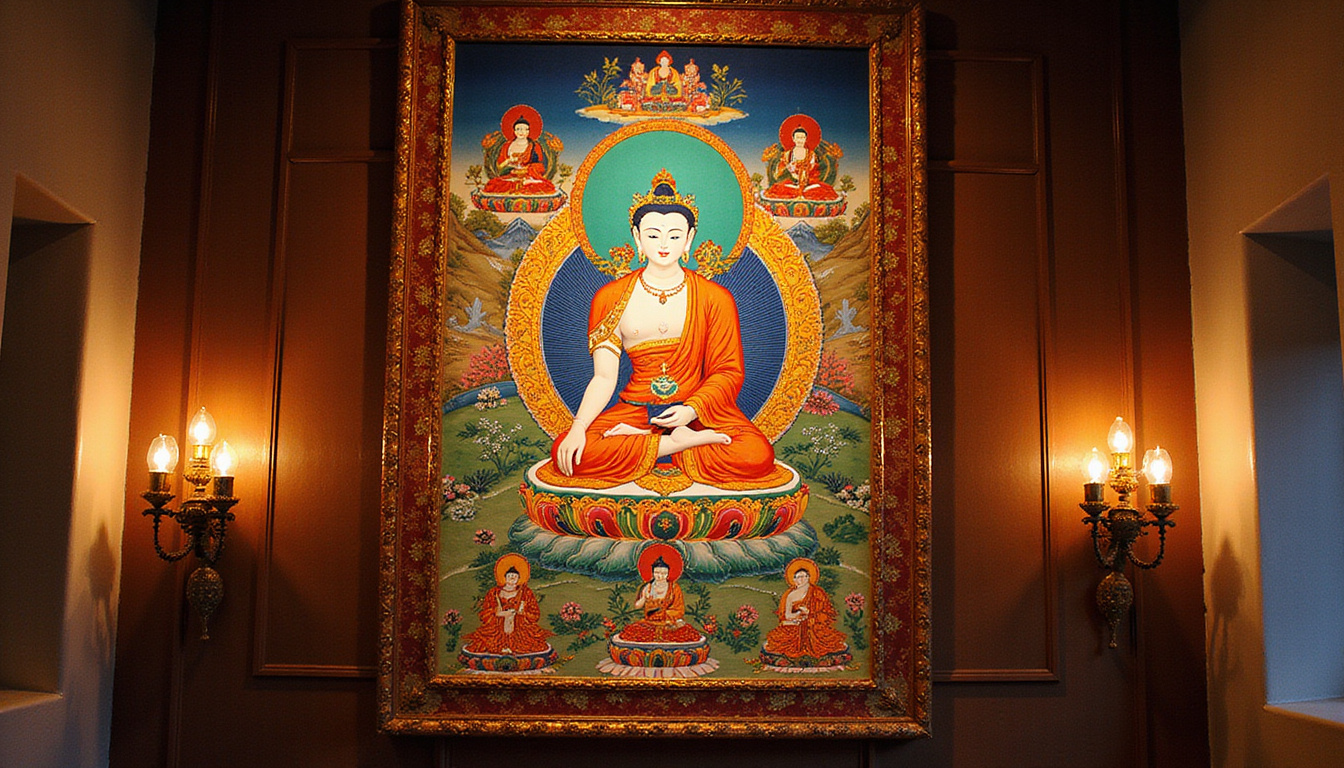
Step 5: Shading, Modeling, and Gradients
This stage transforms flat shapes into luminous, three-dimensional forms.
Light Source and Volume
- Decide on a consistent light direction (often from the upper left or center front).
- Add darker tones gradually to define contours: cheeks, neck, folds in robes, petals on lotus thrones.
- Use soft transitions rather than harsh boundaries; Thangka painting traditionally favors gentle gradations.
Glazing and Layering
- Build depth through multiple translucent layers instead of one thick coat.
- Thin your paint carefully: too much water will cause blotching; too much binder will create shine and cracks.
Facial Modeling
- The face receives especially careful attention:
- Subtle shadows under the eyebrows, nose bridge, lower lip, and chin
- Soft blush at cheeks for some deities
- Gentle transitions around the eyes and forehead
The goal is a serene, timeless expression that radiates inner calm.
Step 6: Detailing, Gold Work, and Ornamentation
With main colors in place, you can bring the Thangka to life through intricate details.
Fine Line Ornamentation
- Add patterns to textiles, borders, and thrones using contrasting but harmonious colors.
- Paint jewelry, hair strands, and delicate floral motifs with very fine brushes.
- Mandala elements, if present, should be crisply defined and geometrically precise.
Gold Application
- Apply gold leaf or gold paint to halos, jewelry, and sacred symbols.
- After drying, gently burnish with a smooth stone to enhance luster.
- Use gold sparingly but purposefully—its role is not merely decorative but symbolic of awakened awareness.
Gold is also traditionally used for certain outlines, especially around halos and key ornaments, to enhance the sense of sacred radiance.
Step 7: The Eyes and Consecration
In many traditional workshops, painting the eyes is considered the most sacred part of Thangka painting.
Opening the Eyes
- The eyes are often painted last, in a quiet, mindful atmosphere.
- Artists sometimes perform a brief ritual or recite mantras as they give the figure “sight.”
- Lines must be extremely fine and symmetrical: pupils, irises, and eyelids are painted with care to avoid a harsh or distracted expression.
Consecration (Optional but Traditional)
In religious contexts, a completed Thangka may be:
- Blessed in a ceremony by a qualified lama or monastic
- Installed in a temple, shrine, or meditation space
- Used in specific visualization practices
While not required for personal artistic practice, understanding this step deepens your insight into how Thangkas function in Buddhist communities (source: Rubin Museum of Art).
Common Mistakes to Avoid in Thangka Painting
- Ignoring proportions: Even minor deviations in facial or body ratios can distort the intended expression of the deity.
- Over-saturating colors: Thangkas should be vivid but harmonious; too many intense tones can feel chaotic.
- Rushing layers: Not letting layers dry can cause cracking, peeling, and muddy colors.
- Using low-quality materials: Cheap pigments and weak binders fade quickly and can disrespect the tradition you’re engaging with.
- Treating it as casual décor: While Thangka painting can certainly beautify a space, it’s rooted in deep spiritual purpose. Approach it with respect.
Practical Tips for Beginners
- Study authentic examples in museums, monasteries, or high-quality catalogues.
- Start with simpler subjects, like a single Buddha figure, before tackling complex mandalas.
- Keep a sketchbook dedicated to practicing eyes, hands, lotuses, and textile patterns.
- Work in shorter, focused sessions rather than long marathons that lead to fatigue and inattention.
- If possible, learn from a trained Thangka painter to receive personalized guidance and corrections.
A Simple Practice Checklist
- [ ] Workspace clean, tools ready
- [ ] Canvas stretched and properly primed
- [ ] Composition and center lines carefully drawn
- [ ] Iconography and colors checked against reliable references
- [ ] Layers allowed adequate drying time
- [ ] Eyes and facial details painted when you’re calm and focused
FAQ: Thangka Painting and Tibetan Buddhist Art
Q1: How long does traditional Thangka painting take?
A single, medium-sized Thangka painting can take anywhere from a few weeks to several months, depending on complexity, the artist’s experience, and the level of detail. Highly intricate mandalas or large multi-figure compositions can take a year or more, especially when using natural mineral pigments and gold.
Q2: Can I learn Tibetan Thangka painting without being Buddhist?
Yes. Many contemporary Thangka painting schools welcome students of any background. What’s essential is respect for the tradition, willingness to follow iconographic guidelines, and openness to the philosophical context. Even if you don’t adopt the spiritual practices, understanding them will enhance your artistic choices.
Q3: What’s the difference between a Thangka art print and an original Thangka painting?
A print is a reproduction—often high-quality—of an existing Thangka. It’s suitable for study or decoration but lacks the tactile layers, mineral depth, and hand-painted line work of an original. An authentic Thangka painting carries the accumulated intention, time, and craftsmanship of the artist, and often, the ritual consecration performed after completion.
Bring Thangka Painting into Your Own Creative Journey
Thangka painting weaves together precise craft, rich symbolism, and contemplative practice. By learning how to prepare the canvas, measure sacred proportions, layer mineral pigments, and bring a serene face to life, you’re not just mastering a technique—you’re engaging with a living artistic lineage that has supported Buddhist practice for centuries.
If you feel drawn to this luminous art form, begin with a simple project: a small Buddha or Bodhisattva, crafted patiently from the ground up. Gather quality materials, study traditional examples, and give each stage the time and attention it deserves. Seek out workshops, teachers, or online courses specializing in Thangka painting to deepen your skills, and let your first piece be the start of a disciplined yet profoundly rewarding practice.
Your brush can become a tool of both artistic expression and inner clarity. Start your Thangka painting journey now, and bring vibrant Buddhist art—and the wisdom it embodies—into your own hands.
Sacred objects often carry deep cultural and spiritual meaning. Learn how these symbols relate to history, spirituality, and the human mind by exploring more articles at SpiritualMindScience.com.