Animal masks have always had a special magic. From childhood dress‑up to cutting‑edge runway shows and viral TikTok trends, animal masks let us step into another world in seconds. Today, they’re not just for Halloween—people use them for parties, performances, activism, content creation, and even mindful play.
This guide walks you through how to design standout masks, make your own eco-friendly versions, and tap into the kind of looks that go viral—without spending a fortune or harming the planet.
Why animal masks are more popular than ever
Several trends have pushed animal masks into the spotlight:
- Social media virality – Short videos favor bold, instantly recognizable silhouettes. An exaggerated fox or frog mask stands out in a scroll.
- Cosplay and fandoms – From anime to video games, animal‑inspired characters are everywhere, and masks offer an easy entry into cosplay.
- Anonymous self‑expression – Masks provide privacy while still letting you perform, protest, or create content.
- Sustainability awareness – Eco-conscious makers are turning cardboard, fabric scraps, and plant‑based materials into high‑impact headpieces.
The result: animal masks that look professional, tell a story, and feel good to wear.
Planning a show-stopping animal mask look
Before you grab scissors and glue, clarify the purpose of your mask. It will shape every design decision.
1. Decide your “role”
Ask yourself:
- Is this for video or photos? Big shapes and clear silhouettes matter more than small detail.
- Is this for a party or festival? Comfort and ventilation become top priority.
- Is this for performance or dance? Secure straps, lightweight materials, and full field of vision are essential.
- Is this for activism or education? The choice of animal can carry symbolic meaning—think polar bears for climate, bees for biodiversity, wolves for rewilding.
2. Choose your animal personality
Pick an animal that matches your intended vibe:
- Cute & approachable – Rabbits, pandas, otters, deer
- Mysterious & elegant – Foxes, ravens, cats, owls
- Powerful & dramatic – Lions, wolves, eagles, tigers
- Quirky & comedic – Frogs, llamas, goats, capybaras
Look up a few reference images and identify what defines the creature: ear shape, snout length, eye spacing, markings. Build your mask design around those key features rather than overloading it with detail.
DIY animal masks: three levels of difficulty
You don’t need a studio or special tools. Here’s how to tackle animal masks at three different skill levels.
Level 1: 30‑minute flat mask (paper or card)
Perfect for kids, classrooms, or last‑minute costumes.
You’ll need:
- Cereal‑box cardboard or thick paper
- Pencil and scissors
- Elastic string or ribbon
- Paint, markers, or colored pencils
- Hole punch (optional)
Basic steps:
-
Trace your face shape
Roughly outline an oval a bit bigger than your face. -
Add animal features
Sketch ears, snout, horns, or antlers. Don’t forget to mark eye holes. -
Cut and refine
Cut out the mask and eye holes. Round off sharp points for comfort. -
Decorate boldly
Use strong color blocks and high‑contrast patterns (spots, stripes, patches). -
Attach straps
Punch holes at the sides, tie elastic or ribbon, and fit to your head.
Flat animal masks are ideal for group activities and can be layered over face paint for extra impact.
Level 2: 3D eco-cardboard mask
If you want more dimension without plastic, recycled cardboard is your best friend.
You’ll need:
- Cardboard boxes
- Craft knife and scissors
- Non‑toxic PVA or flour‑and‑water glue
- Paper tape or masking tape
- Non‑toxic paints or leftover house paint
Approach:
- Build a base shell – Create a simple “helmet” that sits comfortably on your head: a band around your forehead with a top strip from front to back, then add side panels.
- Stack and layer – Use additional pieces to build snouts, brows, cheeks, or beaks. Angle them for more drama.
- Curve by scoring – Lightly score cardboard on the inside of the curve to bend it smoothly.
Once assembled, seal with a thin layer of glue and paper, let dry, then paint. The layered effect can mimic fur, feathers, or scales.
Level 3: Sculpted paper‑mâché or foam
For show pieces, theatre, or viral content, go sculptural.
Material options:
- Paper‑mâché (recycled paper + glue) – Biodegradable, cheap, lightweight.
- EVA foam – Flexible, great for clean, angular designs (popular in cosplay).
- Fabric over a wire frame – Breathable, expressive, good for oversized, theatrical animal masks.
Whichever you choose, consider:
- Weight – Aim to keep the mask under ~10–12% of your body weight if it’s a full headpiece.
- Balance – Heavy snouts or horns should be counterbalanced to avoid neck strain.
- Visibility and airflow – Hide ventilation holes in nostrils, mouths, or under fur and feathers.
Eco-friendly animal masks: materials that don’t cost the earth
If you work with animals as a theme, it’s natural to think about the planet too. An eco‑conscious approach to animal masks means rethinking materials and disposal.
Best low‑impact materials
- Recycled cardboard & paper – Ubiquitous, recyclable, and compostable when not coated.
- Natural fabrics – Cotton, linen, hemp, and wool felt where possible.
- Plant‑based glues – Flour‑and‑water paste or starch‑based glue for paper‑mâché.
- Natural dyes or non‑toxic paints – Especially if kids will wear the masks.
Materials to minimize or avoid
- Glitter and sequins (especially PVC‑based)
- Unlabeled spray paints and harsh solvents
- Single‑use plastics and foam that can’t be recycled in your area
When you do use synthetics (like EVA foam or hot glue), try to use them sparingly in high‑stress areas rather than as the main structure.
End‑of‑life: what happens after the party?
Design your animal masks with an “afterlife” in mind:
- Make elements modular, so you can detach horns, ears, or decorations and reuse the base.
- Use separable layers (e.g., no resin coatings) so cardboard and fabric can be recycled or composted.
- Take photos and videos before the event so you can repurpose content even after the physical mask is gone.
For more on sustainable craft materials, organizations like Greenpeace offer guidance on plastics and microplastics in art supplies (source).
Viral animal mask looks: what makes them scroll‑stopping?
Scroll any short‑form video platform and you’ll spot the same patterns in animal masks that go viral.
1. Exaggerated silhouettes
Silhouettes are everything on a tiny screen. Think:
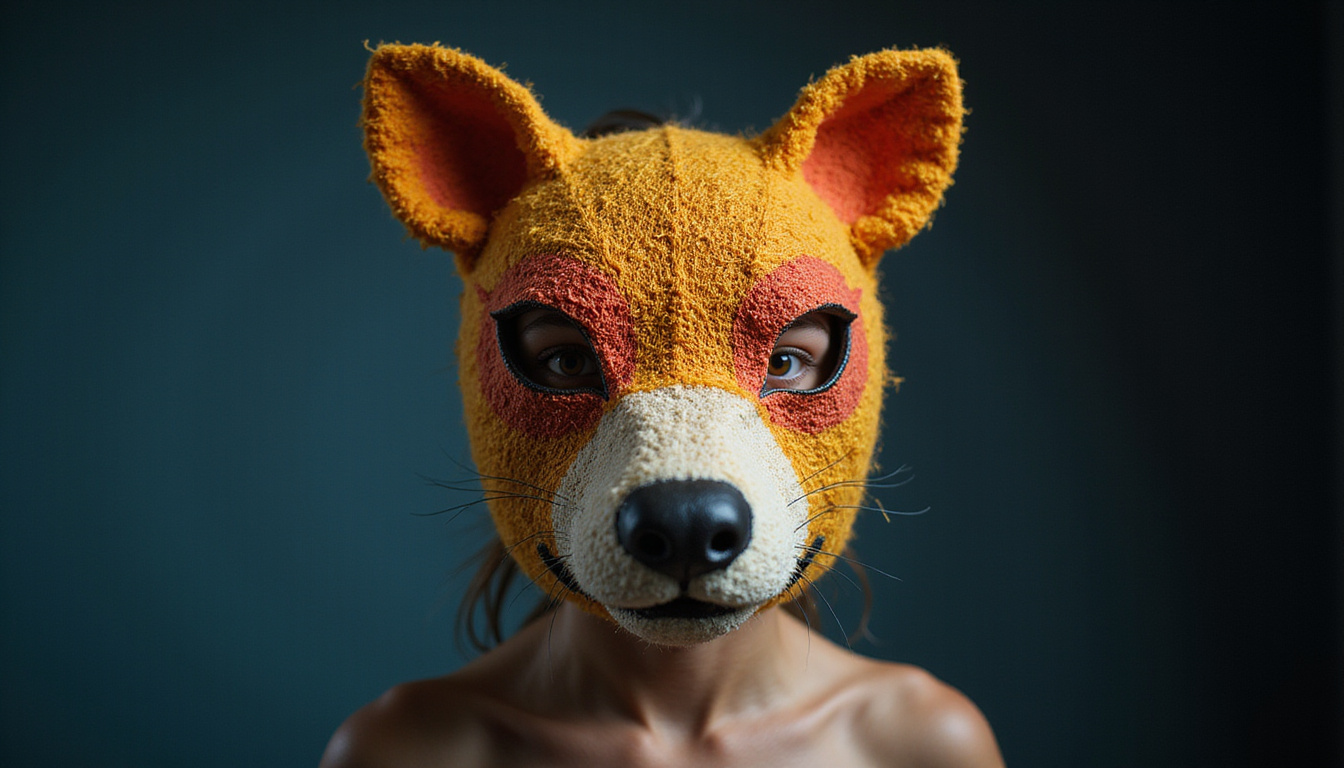
- Oversized ears (bat, fennec fox, rabbit)
- Minimalist but huge beaks (crow, toucan)
- Long, surreal necks or horns (giraffe, antelope, dragon hybrids)
The outline should be recognizable in one second, even in low light.
2. Limited color palette with punch
Using too many colors weakens impact. Instead:
- Pick 1–2 main colors + 1 accent.
- Use high contrast (black and white cow, red fox with white tips).
- Reserve metallics (gold, silver) for key details like eyes or claws.
3. Movement and texture
Masks feel more alive when they move with you:
- Attach fringes, feathers, or fabric “fur” that catches motion.
- Use hinged jaws or blinking eyelids on more advanced builds.
- Add sound: bells in antlers, rustling leaves around a deer mask, etc.
4. Story over spectacle
The most shared looks aren’t just pretty—they tell a story:
- A fox mask worn during a mysterious forest walk.
- A bee mask used in a short explaining pollination.
- A whale mask in a climate‑change performance piece.
Plan a simple narrative: “I am this animal, in this setting, doing this thing.” Your mask becomes a character, not just a prop.
Comfort and safety: non‑negotiables for animal masks
A stunning mask isn’t worth much if you can’t wear it for 10 minutes. Build in comfort from the start.
- Vision: Test in a mirror. Can you see steps? Peripheral movement? Use mesh for larger eye holes if needed.
- Breathing: Ensure generous ventilation through nose, mouth, or hidden vents.
- Skin contact: Line interior contact points with soft fabric or foam. Avoid rough cardboard edges.
- Weight & strain: Use a snug harness (chin strap, crown band, and back band) on large animal masks to distribute load.
Especially for kids:
- Stick to non‑toxic, water‑based paints and glues.
- Use Velcro or breakaway fasteners instead of tight elastic to reduce risk of entanglement.
Customizing animal masks for different events
Parties and festivals
- Opt for lightweight designs; leave your heaviest horns at home.
- Add UV‑reactive paint or reflective tape for night events.
- Integrate LED fairy lights around eyes or antlers (secure battery packs well).
Theatre and performance
- Design for long wear (comfort lining, balanced weight).
- Create multiple identical masks or modular parts in case of damage.
- Consider how animal masks look from the back row—bolder is better.
Content creation and cosplay
- Plan your mask around the camera frame you use most (portrait vs. landscape).
- Keep expressive areas (eyes, mouth) uncovered or translucent to preserve emotion.
- Design versions that pack flat or disassemble for conventions and travel.
One simple workflow to go from idea to finished mask
Use this basic checklist on any new project:
- Define purpose (party, video, protest, theatre).
- Choose animal and gather 3–5 reference images.
- Sketch 2–3 silhouette thumbnails.
- Select eco‑friendly base materials.
- Build a cheap paper prototype and test fit.
- Construct final base structure.
- Add details (ears, snouts, horns, textures).
- Prime and paint with a limited palette.
- Add straps, lining, and ventilation.
- Test in real conditions (moving, dancing, filming) and tweak.
FAQ: common questions about animal masks
1. How do I make durable animal masks for repeated use?
Use a sturdy base like layered cardboard or EVA foam, sealed with paper‑mâché or flexible primer. Reinforce stress points (straps, horns, jaw hinges) with extra fabric, tape, or webbing. Store masks in a cool, dry place, ideally suspended or supported to avoid warping.
2. What animal mask ideas work best for group costumes?
Choose easily repeated designs: foxes, wolves, cats, or birds in different colors. Keep the base shape similar but vary ear shapes, markings, or accessories (scarves, crowns, flowers). This creates visual unity while giving each person a distinct character.
3. Can I create animal face masks that are both protective and decorative?
If you’re starting from a standard cloth or surgical mask, decorate the outside only, using light materials like fabric appliqués or fabric paint. Avoid glues and paints that could affect breathability. Build ears, snouts, or whiskers onto a separate lightweight frame that sits over or around the face mask instead of directly on it.
Bring your next character to life
You don’t need a Hollywood budget or plastic‑heavy materials to make animal masks that steal the spotlight. With a clear purpose, a bold silhouette, and thoughtful, eco‑friendly materials, you can create pieces that photograph beautifully, perform reliably, and respect the creatures that inspired them.
Start with one animal that speaks to you, sketch three quick designs, and choose the simplest to build this week. Whether you’re crafting for a party, a play, or your next viral video, the most unforgettable masks are the ones you actually finish and wear.
Gather your cardboard, fabric scraps, and paints, invite a friend or two, and bring your first creature to life. Your next favorite character—and maybe your next viral moment—could be hiding in your recycling bin right now.
Animals have inspired symbols and beliefs across cultures for centuries. Discover how these traditions connect with psychology, spirituality, and human consciousness at SpiritualMindScience.com.