Turning an old horseshoe into decor is one of the easiest ways to add rustic character and good-luck charm to your home. Whether you’ve collected a few from a local farrier, inherited them from a farm, or found some at a flea market, these little U-shaped pieces of iron can become surprisingly chic. With some basic tools and a bit of creativity, you can create wall art, functional organizers, and thoughtful gifts that feel both modern and meaningful.
Below you’ll find step-by-step project ideas, tips for prepping and finishing metal, and simple styling advice so your horseshoe creations look intentional—not like leftovers from the barn.
Why Decorate With Old Horseshoes?
Before you dive into specific projects, it helps to understand why old horseshoes are such a great DIY material:
- Symbolism & sentiment – Horseshoes have long been associated with luck and protection in many cultures (source: Encyclopedia Britannica).
- Durable & versatile – Made to withstand impact and weather, they’re tough enough for indoor or outdoor decor.
- Low or no cost – Farriers often have worn-out shoes they’ll give away, and you can find them cheaply at antique shops and farm auctions.
- Instant rustic texture – The curves, nail holes, and patina give your pieces a character you can’t fake with store-bought decor.
With a little prep, these scraps of iron can become polished, modern pieces that fit easily into farmhouse, industrial, or eclectic interiors.
Getting Started: Sourcing and Prepping Old Horseshoes
Where to Find Horseshoes
- Local farriers or stables – Ask if they have worn-out shoes destined for the scrap bin.
- Flea markets and antique stores – Often sold in bulk or as mixed hardware.
- Rural auctions and farm sales – Good source for older, more decorative styles.
- Online marketplaces – Look for lots of used horseshoes to keep costs low.
Cleaning and Safety Basics
Old metal can be dirty, rusty, or greasy, so some prep work is essential:
-
Safety first
- Wear safety glasses, a dust mask, and gloves.
- Work in a ventilated area, especially if using chemical rust removers or spray paint.
-
Initial cleaning
- Use a stiff wire brush to scrub off dirt and loose rust.
- For heavy grime, soak the horseshoe in warm, soapy water for 15–30 minutes, then scrub.
-
Rust removal (if desired)
- Light rust: Sand with 80–120 grit sandpaper or use a wire wheel on a drill.
- Heavy rust: Soak in white vinegar for 12–24 hours, then scrub clean, rinse, and dry thoroughly.
-
Finishing the base
- For a polished look, sand progressively finer (up to 220–320 grit) and seal with clear spray lacquer.
- For a matte/industrial look, leave some patina and just seal with a clear matte topcoat.
- For color, apply metal-friendly spray paint in thin, even coats.
Once your horseshoes are clean and sealed, you’re ready to turn them into decor.
Project 1: Horseshoe Coat Rack and Key Holder
A horseshoe coat rack or key holder is both functional and stylish, and it’s simple enough for beginners.
Materials
- 2–5 cleaned horseshoes
- Wooden board (reclaimed wood looks great)
- Wood screws and washers
- Drill and metal drill bits (if you need extra holes)
- Wall anchors (if not screwing into studs)
- Sandpaper, stain/paint, and sealer for the wood (optional)
Steps
-
Prep the board
- Cut your board to length and sand the edges.
- Stain or paint if desired; let it dry completely, then seal.
-
Plan the layout
- Arrange the horseshoes open-end up (for the “luck stays in” tradition) along the board.
- Space them evenly, leaving enough room for hanging coats or keys.
-
Drill mounting holes
- Many shoes already have nail holes. If needed, drill extra holes through the horseshoe so you can firmly screw it to the board.
-
Attach the horseshoes
- Use wood screws with washers through the horseshoe holes into the board.
- Check that each shoe is secure and level.
-
Mount the rack
- Attach hanging hardware to the back of the board.
- Use wall anchors or screw directly into studs for heavier loads.
This same idea works on a smaller scale for a key holder: use a shorter board, smaller horseshoes (or cut-down ones), and mount near your entryway.
Project 2: Horseshoe Candle Holders for Rustic Ambiance
Horseshoe candle holders can be minimalist or ornate, and they’re perfect for tabletops, mantels, or outdoor dining.
Simple Single-Candle Holder
Materials
- 1 horseshoe
- 1 small metal candle plate or washer large enough for a tea-light or votive
- Metal epoxy or weld (if you weld)
- Heat-resistant paint or clear sealant
Steps
-
Position the horseshoe
- Stand it on its ends in a U-shape, or lay it flat on a non-flammable surface.
-
Attach the candle plate
- Center the plate at the bottom curve of the horseshoe.
- Secure it with high-strength metal epoxy or by welding, if you have the tools.
-
Finish and seal
- Paint or clear-coat as desired.
- Let everything cure fully before placing a candle.
Multi-Candle Centerpiece
For a more dramatic centerpiece, line up 3–5 horseshoes, slightly overlapping, and attach small plates or glass votive holders along the curves. Set it on a reclaimed wood plank for a finished, layered look.
Always keep open flames supervised and away from flammable decor.
Project 3: Horseshoe Wall Art and Gallery Pieces
If you love gallery walls, horseshoes make excellent focal pieces or accents.
Minimalist Horseshoe Wall Art
-
Choose a background
- Use a framed wood panel, canvas, or metal sheet.
- Paint or stain it in a neutral color.
-
Create a design
- Single large horseshoe centered for a bold, simple statement.
- Group of 3 or 5 arranged in a row or gentle arc.
- Heart shape or infinity symbol made from two overlapping shoes.
-
Attach
- For wood: screw the horseshoes directly into the backing.
- For canvas or thin material: glue with strong construction adhesive or epoxy and add hidden support behind the canvas if needed.
-
Style
- Hang as part of a gallery wall, mixing in photos, signs, and other textures.
This approach works especially well for farmhouse, Western, or industrial-inspired interiors.
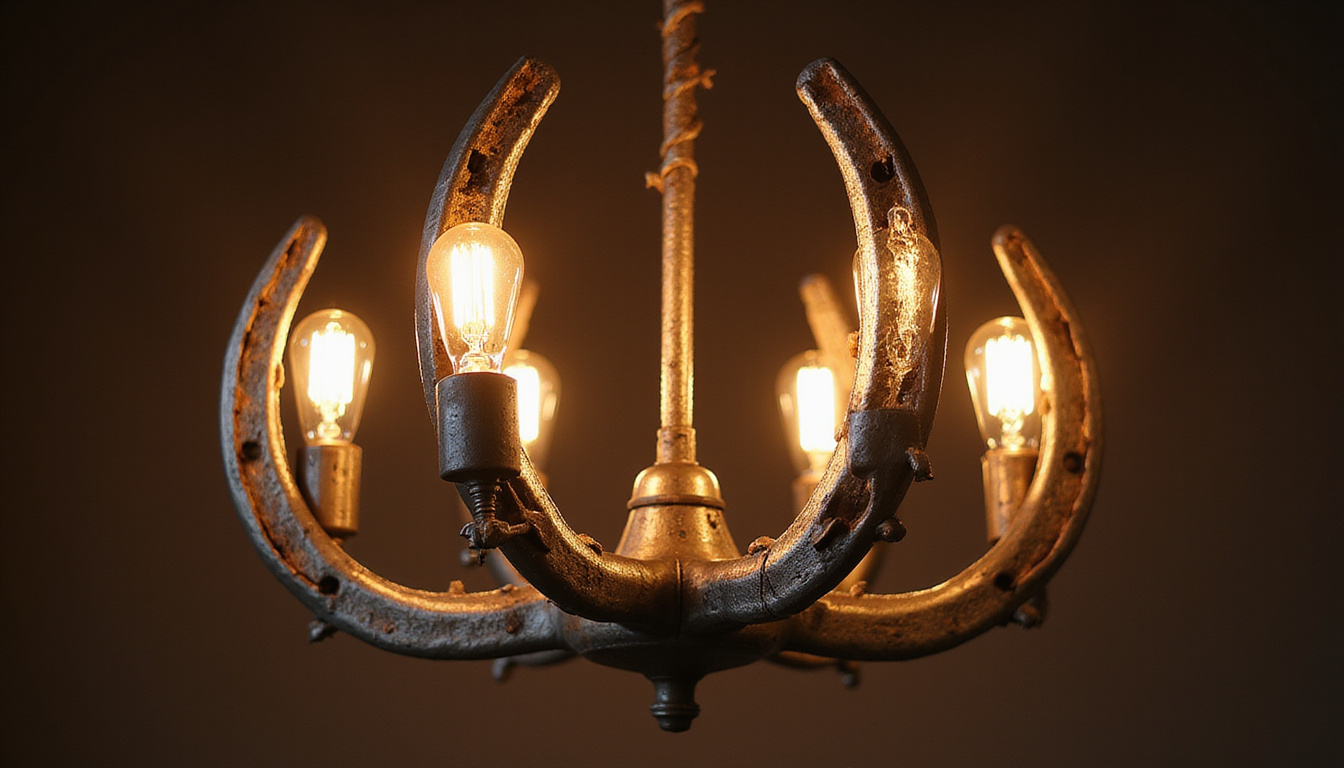
Project 4: Horseshoe Wine Rack or Bottle Holder
A horseshoe wine rack offers a perfect mix of function and rustic charm.
Countertop Bottle Holder (Single Bottle)
Materials
- 2–3 horseshoes
- Metal epoxy or welding setup
- Non-slip pads
Steps
- Create the base
- Stand one horseshoe on its ends; this forms the base.
- Add support
- Attach a second horseshoe at an angle so the bottle can rest securely between the two.
- Adjust the angle
- Test with an empty bottle; it should balance without tipping.
- Finish
- Seal or paint, and add non-slip pads to the bottom.
Wall-Mounted Wine Rack (Multiple Bottles)
- Layout
- Arrange horseshoes in a vertical pattern, alternating left and right so each bottle can rest in the curve of one shoe above and the toe of one below.
- Mount
- Secure the shoes to a sturdy board or directly to wall studs.
- Test
- Use empty bottles to ensure space and stability before loading.
Project 5: Horseshoe Jewelry and Accessory Hooks
A compact horseshoe hook strip is ideal for hanging necklaces, bracelets, scarves, or even dog leashes.
Materials
- 1–3 horseshoes
- Small S-hooks or screw-in hooks
- Wood backing (optional)
Steps
-
Decide on the format
- Mount a single horseshoe and hang S-hooks from its nail holes.
- Mount several in a row on a narrow board for more hanging points.
-
Install hooks
- Insert small hooks into the nail holes or along the bottom curve (pre-drill if needed).
- For S-hooks, simply hang them through the existing holes.
-
Mount on the wall
- Use picture hangers for lighter jewelry.
- For heavier items, screw into studs or use proper anchors.
This project is particularly useful in entryways, bathrooms, or closets where you need small, sturdy hooks.
Project 6: DIY Horseshoe Crafts for Gifts
Horseshoe crafts make charming, meaningful gifts that feel personal without requiring advanced skills.
Consider these smaller projects:
- Horseshoe heart – Weld or epoxy two shoes into a heart shape. Add a ribbon and a tag for weddings or anniversaries.
- Lucky paperweight – Clean, polish, and seal a single horseshoe. Add felt to the underside and gift it with a note about good luck.
- Name or monogram art – Arrange multiple horseshoes to form initials or a family name, mounted on a reclaimed board.
- Holiday decor – Paint horseshoes red, green, or white and add greenery or ribbon to make rustic wreaths and ornaments.
These pieces are easy to customize with paint colors, engraving, or attached charms.
Styling Tips: Making Horseshoe Decor Look Chic, Not Cluttered
To keep your horseshoe DIY projects feeling chic rather than overly themed:
- Limit quantity in each room – One or two visible horseshoe items per space is usually enough.
- Mix materials – Pair iron with wood, glass, linen, and plants to soften the look.
- Focus on function – Choose decor that also serves a purpose: hooks, racks, candle holders, or organizers.
- Stick to a color palette – Black, bronze, brushed steel, or a few accent colors will look more cohesive than a rainbow of paints.
- Balance old and new – Combine aged horseshoes with modern furniture and clean lines for an updated rustic feel.
Common Tools and Supplies Checklist
If you plan to make several horseshoe DIY projects, keep these on hand:
- Wire brush and sandpaper (80–320 grit)
- Drill with metal and wood bits
- Metal epoxy or welding tools (if you weld)
- Spray primer and metal spray paint
- Clear matte or gloss sealer
- Wood boards (scrap or reclaimed works well)
- Screws, washers, wall anchors, picture hangers
- Safety glasses, gloves, and dust mask
Having a basic horseshoe “kit” ready makes it easy to turn new ideas into finished decor quickly.
FAQ: Horseshoe DIY and Decor
Q1: How do you hang a horseshoe for good luck in the house?
Traditionally, people hang a horseshoe open-end up over a doorway so the luck “doesn’t spill out.” Use sturdy screws or nails through the existing nail holes, and make sure the shoe is securely fastened to a stud or with proper anchors.
Q2: Can I use rusty horseshoes for crafts, or do they need to be cleaned first?
You can use rusty horseshoes in DIY crafts, but it’s best to at least remove loose rust and dirt. A wire brush and light sanding will keep rust from flaking onto your furniture. If you like the aged look, clean and then seal with a clear matte topcoat to preserve the patina.
Q3: What paint works best for horseshoe crafts and outdoor decor?
For outdoor horseshoe decor, use a metal-specific spray paint with built-in rust protection. Apply a metal primer first if the shoes are heavily weathered, then finish with 2–3 thin coats of paint and a clear sealer for extra durability.
Transforming an old horseshoe into chic decor is a satisfying way to bring history, craftsmanship, and a bit of “luck” into your everyday spaces. You don’t need advanced skills—just a few basic tools, some imagination, and a willingness to experiment.
If you’re ready to get started, pick one project—like a simple key holder or candle stand—gather a handful of old horseshoes, and spend an afternoon creating. As you build confidence, you can scale up to wine racks, gallery art, and custom gifts that feel as timeless as the iron they’re made from. Start your first horseshoe DIY project this week and see how quickly these once-forgotten bits of metal become some of your favorite pieces of home decor.
Explore the Science Behind Spirituality
This guide explored the meaning and history of good luck symbols. To discover the psychology, consciousness, and scientific perspectives behind spiritual beliefs, visit SpiritualMindScience.com.