Conch Shell DIY: Transform Beach Finds Into Stunning Home Decor
If you’ve ever walked a shoreline and picked up a conch shell, you already know the pull they have—weighty, intricate, and almost too beautiful to leave behind. Instead of letting that conch shell gather dust in a box or basket, you can turn it into eye-catching home decor that feels both coastal and curated. With a few simple tools and some creativity, your beach finds can become unique pieces you’ll be proud to display or gift.
Below you’ll find step-by-step conch shell DIY projects, safety tips, styling ideas, and answers to common questions—everything you need to transform shells into stunning decor.
Choosing the Right Conch Shells for DIY Projects
Before you start gluing, drilling, or painting, choose your shells with intention. The shell you pick affects how easy it is to work with and how polished the final piece will look.
What to Look For
- Structural integrity: Avoid heavily cracked or crumbling shells. Tiny chips are fine and can add character, but large cracks may worsen when you drill or cut.
- Size and weight: Larger conch shells work well for centerpieces, bookends, and lamps; smaller shells are ideal for ornaments, magnets, and jewelry dishes.
- Shape consistency: If you’re creating a pair (bookends, candle holders, etc.), try to find shells of similar size and visual weight.
- Surface texture: Smoother shells are easier to paint or decoupage, while more textured shells look beautiful left natural.
Ethical and Legal Considerations
Not all conch shells can be collected or transported legally. For instance, queen conch is protected in many areas due to overharvesting (source: NOAA Fisheries). Always:
- Check local regulations before collecting.
- Never take live animals—only empty shells.
- Consider buying ethically sourced, already-cleaned shells from reputable vendors if in doubt.
Cleaning and Preparing Your Conch Shell
Proper prep is the difference between a shell that looks “found on the beach” and one that looks like intentional home decor.
Step 1: Initial Rinse
- Rinse the shell thoroughly under cool running water to remove sand and debris.
- Use a soft brush (old toothbrush) to scrub crevices and the interior opening.
Step 2: Deep Clean and Deodorize
Sometimes conch shells hold residual organic material that can cause odor. To clean safely:
- Fill a bucket with a 50/50 mix of water and white vinegar.
- Soak the shell for 10–30 minutes. Don’t over-soak; vinegar can slowly etch the calcium.
- Scrub again with the brush, focusing on stubborn spots.
- Rinse thoroughly with clean water.
- Let the shell air-dry completely—ideally 24 hours.
Step 3: Optional Finishing
Depending on the look you want:
- Leave natural: Perfect for rustic, organic styling.
- Seal with clear spray: Use a matte or satin clear acrylic sealer to protect color and add a finished look.
- Polish lightly: For a subtle sheen, buff with a soft cloth after sealing.
Essential Tools and Materials for Conch Shell DIY
You don’t need a full workshop to work with a conch shell, but some basic tools make the process smoother and safer.
- Protective gear: safety glasses, dust mask, and gloves
- Soft and medium-grit sandpaper
- Strong adhesive: E6000, marine epoxy, or hot glue (for lightweight applications)
- Drill with masonry or glass bits (for making holes)
- Clear acrylic sealer (spray or brush-on)
- Paints: acrylics, spray paint, or metallic paints
- Brushes, painter’s tape, and drop cloth
- Optional: LED tealights, corks, felt pads, picture hanging hardware
Project 1: Conch Shell Centerpiece Bowl
A large conch shell can become a striking centerpiece bowl for small decorative items, dried flowers, or air plants.
How to Make It
- Select a stable shell: Choose one that naturally sits at an angle without tipping easily.
- Clean and seal: Prepare as outlined above, then add a clear sealer if desired.
- Create a stable base (optional):
- Attach clear rubber feet or felt pads where the shell rests on the table.
- For extra stability, glue the shell onto a slice of driftwood, a small wooden plaque, or a stone tile.
- Style the interior:
- Add air plants, dried moss, and tiny shells for a natural vignette.
- Use as a key catch-all near your entryway.
- Fill with decorative stones or glass beads to match your color scheme.
This project is minimal-effort but high-impact—ideal if you’re new to working with a conch shell.
Project 2: Conch Shell Candle Holder (Real or Flameless)
Conch shells make beautiful candle holders, especially for tealights or LED candles.
Materials
- Medium conch shell
- Tealight candles or LED tealights
- Sand or small pebbles (for leveling)
- Optional: heat-resistant glass votive insert
Steps
- Test fit the candle: Place your tealight in the opening of the shell to see how it sits.
- Level with filler: Add a layer of sand or pebbles to create a flat base inside the shell for the tealight.
- Secure (optional): For permanent decor, use a small amount of clear adhesive under the tealight cup.
- Safety note: If using real candles, never leave them unattended, and ensure the flame is not touching the shell. For worry-free ambiance, choose LED tealights instead.
Project 3: Coastal Conch Shell Wall Art
A single large conch shell can act as sculptural wall decor, or you can group several shells in a shadow box for a gallery effect.
Option A: Single Shell Wall Mount
- Attach hanging hardware:
- Glue a D-ring hanger or sawtooth hanger to a small piece of wood.
- Glue the wood firmly to the flattest part of the shell’s back with strong epoxy.
- Reinforce and cure: Let the adhesive cure fully according to instructions (often 24 hours).
- Hang: Use a sturdy wall anchor if your shell is heavy.
Option B: Framed Conch Shell Display
- Choose a deep shadow box frame.
- Line the back with linen, burlap, or painted board.
- Secure the shell with epoxy or discrete wire loops.
- Add smaller shells or labels for a museum-style display.
This type of wall art looks especially refined in neutral color schemes or coastal-inspired rooms.
Project 4: Painted or Gilded Conch Shell Accents
Painting or gilding a conch shell can dramatically change its vibe—from rustic beach find to modern art object.
Preparation
- Lightly sand glossy areas so paint adheres.
- Wipe away dust and let the shell dry before painting.
Design Ideas
- Color-dipped look: Tape off a diagonal section and spray or brush on a bold color (navy, black, emerald).
- Metallic edges: Use gold, brass, or rose gold paint to highlight ridges and the shell lip.
- Ombre effect: Blend two or three shades from base to tip with a dry brush.
- Patterned detail: Add fine lines, dots, or mandala patterns with a small brush or paint pen.
Finish with a clear sealer to protect your design. Display on bookshelves, mantels, or coffee tables.
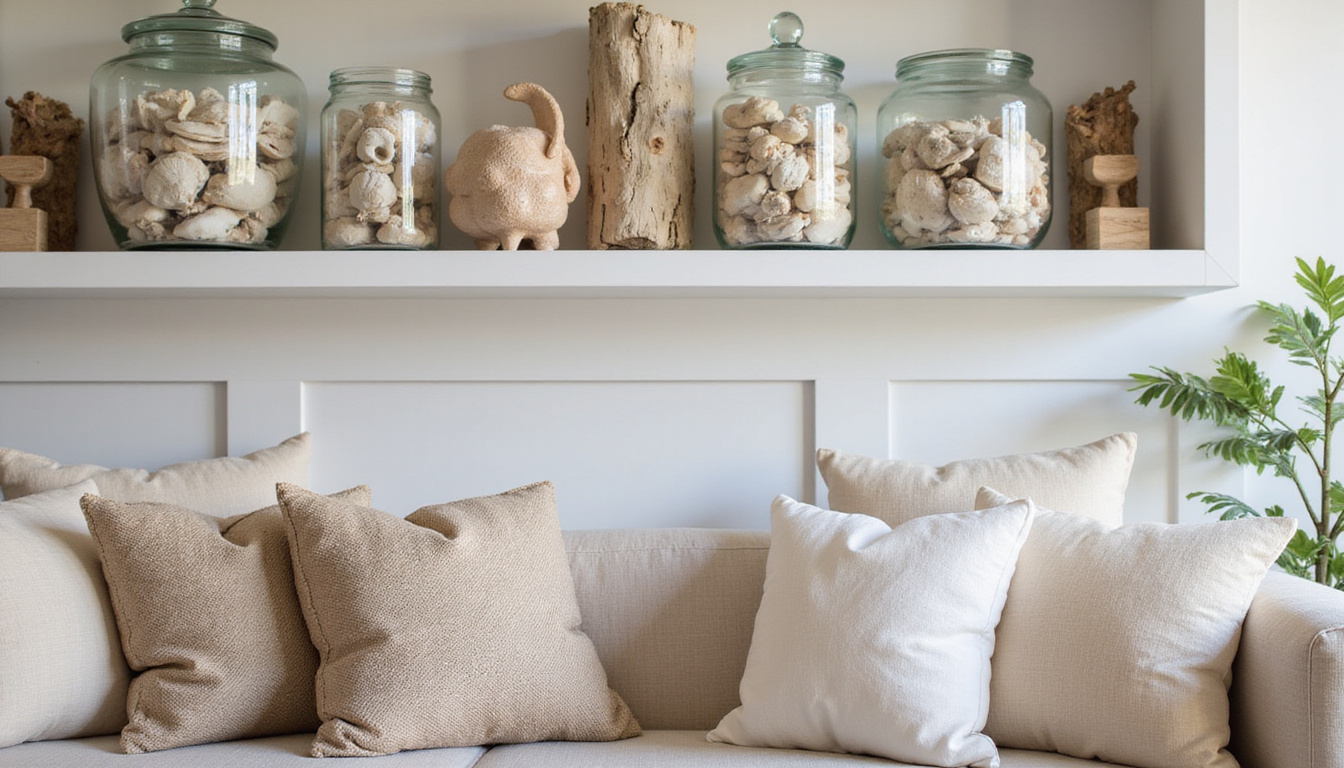
Project 5: Conch Shell Planters and Air Plant Holders
While conch shells are not ideal for traditional potted plants with soil and drainage, they’re perfect for air plants (tillandsias) or small faux succulents.
Air Plant Holder
- Choose the right shell size: Aim for an opening that snugly fits your air plant.
- Prepare the shell: Clean and seal if desired.
- Add a cushion: Place a small amount of dried moss or coconut fiber inside.
- Insert the air plant: Nestle it in without crushing the base.
Faux Succulent Arrangement
- Use high-quality faux succulents, small stones, and moss.
- Glue in place for a permanent, low-maintenance arrangement.
- Cluster several conch shell planters on a tray for a stylish centerpiece.
Remember that real air plants still need periodic misting or soaking, so keep them removable instead of gluing them down.
Display Ideas: Styling Your Conch Shell Decor
How you style your finished projects can make them feel intentional rather than random beach souvenirs. Consider:
- Bookshelves: Mix shells with books, framed photos, and small vases.
- Bathroom decor: A conch shell candle holder or air plant adds spa-like calm.
- Coffee table: Use a conch shell centerpiece bowl on a tray with coasters and a small stack of art books.
- Entryway: A conch shell catch-all for keys and coins adds instant character.
For a cohesive look, repeat one element—like metallic paint, natural wood, or a specific color—throughout your conch shell pieces.
Safety Tips When Working With a Conch Shell
Working with shells involves dust, sharp edges, and sometimes power tools. Keep these precautions in mind:
- Wear safety glasses when drilling or cutting.
- Use a dust mask—shell dust can irritate eyes, nose, and lungs.
- Go slowly when drilling to avoid cracking the shell; use a small bit first, then enlarge the hole if needed.
- Keep projects with small shells or loose parts away from young children and pets.
- Only use non-toxic, well-ventilated paints and sealers indoors.
Quick Project Ideas Using Smaller Conch Shell Pieces
If you have small conch shells, fragments, or chips, you can still create beautiful decor.
Here are a few fast options:
- Conch shell magnets: Glue small shells onto strong magnets for your fridge or office board.
- Decorative jar fillers: Mix conch shell fragments with sand and pebbles in glass jars or vases.
- Photo frame trim: Attach tiny shells around the border of a plain frame with strong glue.
- Table number holders: For events, glue conch shells onto bases and clip or slot in card numbers.
- Napkin rings: Glue small shells onto simple metal or wooden rings for coastal table settings.
Common Mistakes to Avoid
- Over-bleaching: Straight bleach can weaken or discolor shells. Use diluted solutions sparingly or stick to vinegar and soap.
- Using flimsy glue: Household craft glue often isn’t strong enough for heavy shells. Choose epoxy or industrial-strength adhesive.
- Ignoring balance: For bookends, wall art, or centerpieces, test stability before committing to final placement.
- Over-decorating: Sometimes less is more. Let the natural beauty of the conch shell remain in focus.
FAQ: Working with Conch Shells for Decor
1. How do I clean a conch shell from the beach without damaging it?
Rinse the conch shell in cool water, scrub gently with a soft brush, and soak it briefly in a 50/50 mix of water and white vinegar to remove residue and odor. Avoid harsh chemicals or long soaks, which can etch the shell.
2. Can I drill a hole in a conch shell for hanging?
Yes, you can drill a small hole in a conch shell using a drill with a masonry or glass bit. Go slowly, apply light pressure, and keep the shell steady, ideally on a padded surface. Wearing eye protection and a dust mask is essential.
3. Is it safe to use a conch shell as a candle holder?
It can be safe if you use a sturdy conch shell, properly level the candle, and never leave it unattended. For extra safety, place a metal or glass tealight holder inside the shell or use flameless LED candles to avoid heat entirely.
Transforming a conch shell into home decor is more than a craft—it’s a way to bring your favorite coastal memories into daily life. With simple tools and a bit of imagination, that shell from your last beach walk can become a centerpiece, wall sculpture, or glowing candle holder that draws compliments and tells a story.
Gather your conch shells, pick one project from this guide, and start today. Once you’ve finished your first piece, you’ll see just how easy—and satisfying—it is to create stunning, personalized coastal decor from what the ocean leaves at your feet.
Sacred objects often carry deep cultural and spiritual meaning. Learn how these symbols relate to history, spirituality, and the human mind by exploring more articles at SpiritualMindScience.com.